The Impact of Social Media Algorithms on User Behavior
June 12, 2024
The Future of Autonomous Vehicles: What to Expect
June 12, 2024How to Build Your Own PC: A Step-by-Step Guide
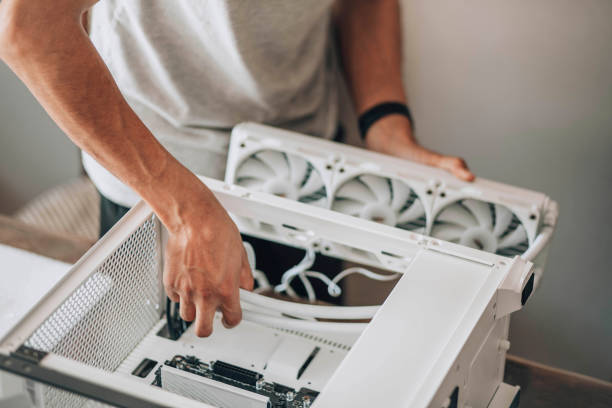
Building your own PC can be a rewarding experience. It allows you to customize your machine to meet your exact needs. This step-by-step guide will walk you through how to build your own PC, from selecting components to assembling them. Whether you’re a beginner or a tech enthusiast, this guide will provide the knowledge you need to build a powerful, personalized computer. You’ll learn about choosing the right processor, memory, and storage, as well as how to install and connect everything. With clear instructions and helpful tips, you’ll find building your own PC easier and more enjoyable than ever.

Step 1: Selecting Components
The first step in how to build your own PC is choosing the right components. You’ll need a CPU, motherboard, RAM, GPU, storage, power supply, case, and cooling system. Each component plays a crucial role in your PC’s performance.
CPU: The Central Processing Unit is the brain of your computer. Choose a CPU that fits your needs, whether it’s for gaming, video editing, or general use.
Motherboard: The motherboard is the main circuit board. Ensure it is compatible with your CPU and has enough slots for RAM, GPUs, and other components.
RAM: Random Access Memory is essential for multitasking. 16GB is a good starting point for most users.
GPU: The Graphics Processing Unit is vital for gaming and graphic-intensive tasks. Choose a GPU that fits your performance needs and budget.
Storage: Decide between SSDs for speed and HDDs for larger storage capacity. Many builders use a combination of both.
Power Supply: Choose a power supply that can handle the total power consumption of your components. It’s crucial to get a reliable power supply to avoid damage.
Case: The case houses all your components. Choose one that fits your style and has good airflow.
Cooling System: Proper cooling is essential to keep your PC running smoothly. Choose between air cooling and liquid cooling systems.
Step 2: Assembling Your PC
Once you’ve gathered all your components, the next step in how to build your own PC is assembly. Follow these steps to put everything together.
1. Prepare Your Workspace: Find a clean, static-free environment to work in. Use an anti-static wristband to avoid damaging components.
2. Install the CPU: Open the CPU socket on the motherboard, align the CPU correctly, and gently place it in the socket. Lock it in place with the retention arm.
3. Install the CPU Cooler: Apply thermal paste to the CPU if necessary. Attach the cooler according to the manufacturer’s instructions.
4. Install RAM: Locate the RAM slots on the motherboard. Open the clips and insert the RAM sticks, pressing down until they click into place.
5. Mount the Motherboard: Place the motherboard in the case, aligning it with the standoffs. Secure it with screws.
6. Install the Power Supply: Place the power supply in its compartment. Secure it with screws and connect the power cables to the motherboard.
7. Install Storage: Attach SSDs and HDDs to their respective slots or bays. Connect them to the motherboard using SATA cables.
8. Install the GPU: Locate the PCIe slot on the motherboard. Insert the GPU and secure it with screws.
9. Connect Cables: Connect all necessary cables from the power supply to the motherboard, GPU, storage, and other components. Ensure all connections are secure.
10. Install Additional Cooling: If using extra fans or a liquid cooling system, install them according to the manufacturer’s instructions.
Step 3: Testing and Booting
After assembling your PC, the next step in how to build your own PC is testing.
1. Double-Check Connections: Ensure all components and cables are securely connected.
2. Power On: Connect your monitor, keyboard, and mouse. Plug in the power supply and turn on your PC.
3. Enter BIOS: Press the appropriate key (usually DEL or F2) to enter the BIOS. Check that all components are detected and adjust settings if necessary.
4. Install Operating System: Insert your OS installation media (USB or DVD) and follow the prompts to install the operating system.
Step 4: Installing Drivers and Software
With your OS installed, the next step in how to build your own PC is installing drivers and software.
1. Install Drivers: Download and install the latest drivers for your motherboard, GPU, and other components.
2. Update OS: Ensure your operating system is up to date by installing all available updates.
3. Install Software: Install your essential software, including web browsers, productivity tools, and any applications specific to your needs.
Step 5: Optimization and Maintenance
The final step in how to build your own PC is optimizing and maintaining your system.
1. Optimize Performance: Adjust settings in your OS and BIOS for optimal performance. Use software tools to monitor and tweak system performance.
2. Regular Maintenance: Keep your PC clean by removing dust and ensuring good airflow. Regularly update drivers and software to keep your system running smoothly.
3. Backup Data: Implement a regular backup strategy to protect your data from loss.
Conclusion
Building your own PC is a fulfilling project that gives you complete control over your computer’s specifications and performance. By following this step-by-step guide, you’ll know how to build your own PC from selecting components to optimizing performance. Enjoy the process and the satisfaction of using a PC tailored to your exact needs.


